Apply to a custom avatar
So you have a custom avatar and wish to use my face tracking on it, here's a guide on how to do so
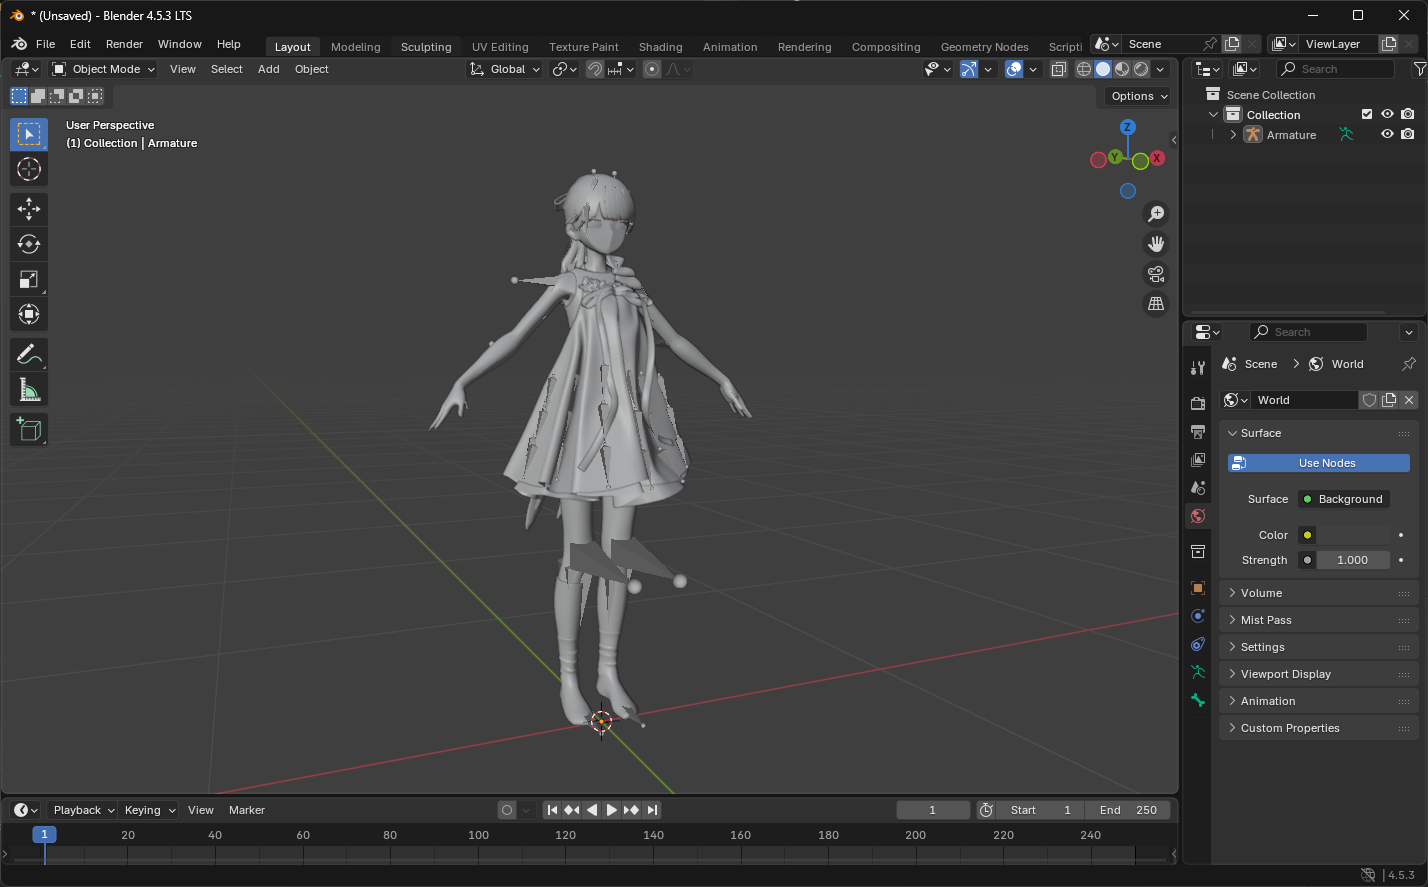
head swap
You'll need to change the head from your custom model to the one that has the face tracking blendshapes and correct weights. here are some steps on how to do so
Locate your custom model's main FBX file and back it up
First you'll need to find your main FBX file that contains the head of your model. To do so:
Select it in your scene hierarchy by left clicking on it:
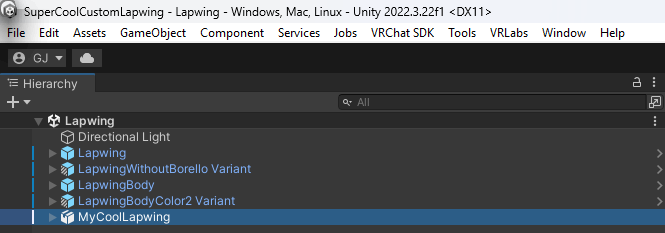
go to the inspector tab (By default on the left hand side)
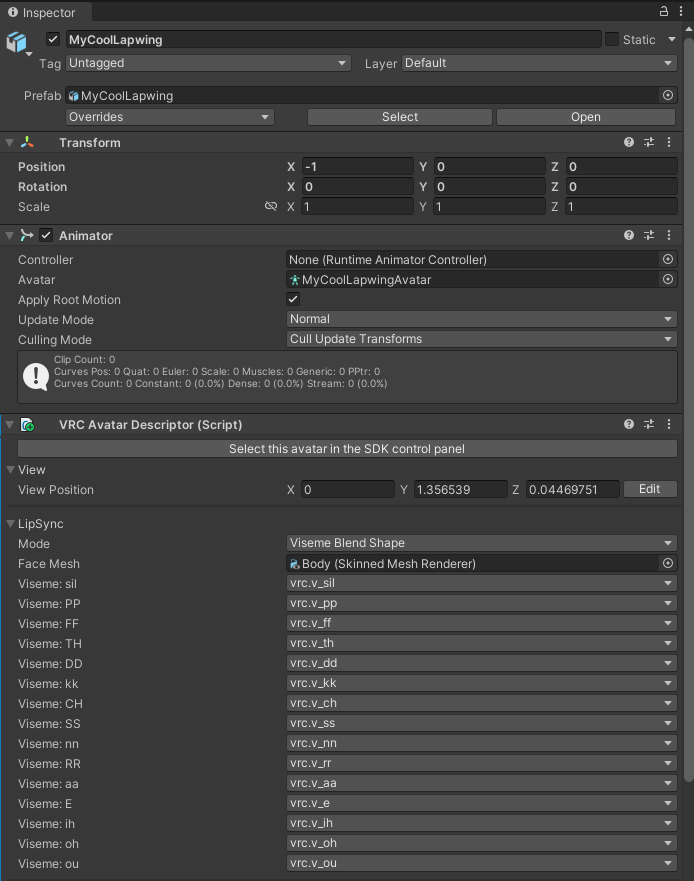
Click on the avatar armature component (the little green icon of a person)
This will reveal the file in the unity file explorer
Right Click on the parent file of the avatar armature component
Export Package
Untick
Include dependenciesin the window that openspress
Export...Select where you want your backup to be stored at
Return back to Unity
Right Click on the file again
Click
Show In Explorer
Open Blender
- Download Blender here
- Follow the install wizzard
- Open Blender
Clear the scene
- Click anywhere on the viewport to remove the startup splash screen
- press
Ato select everything - press
Delto delete everything
Import your custom model
- Direct yourself at the top left of your window
- Click
File - Click
Import - Click
FBX
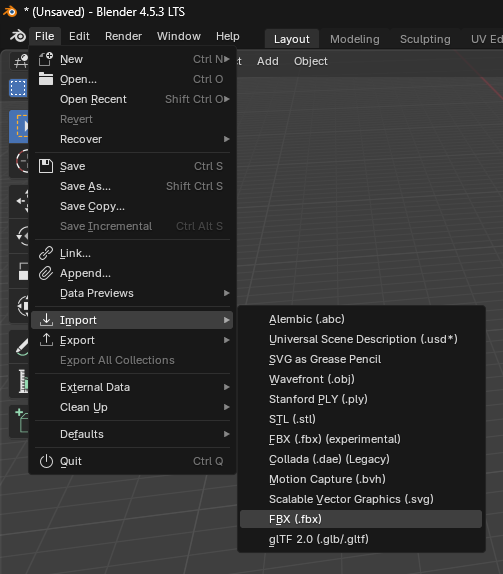
- Select where your custom model is located at

- Press the
Import FBXbutton at the bottom right of the window
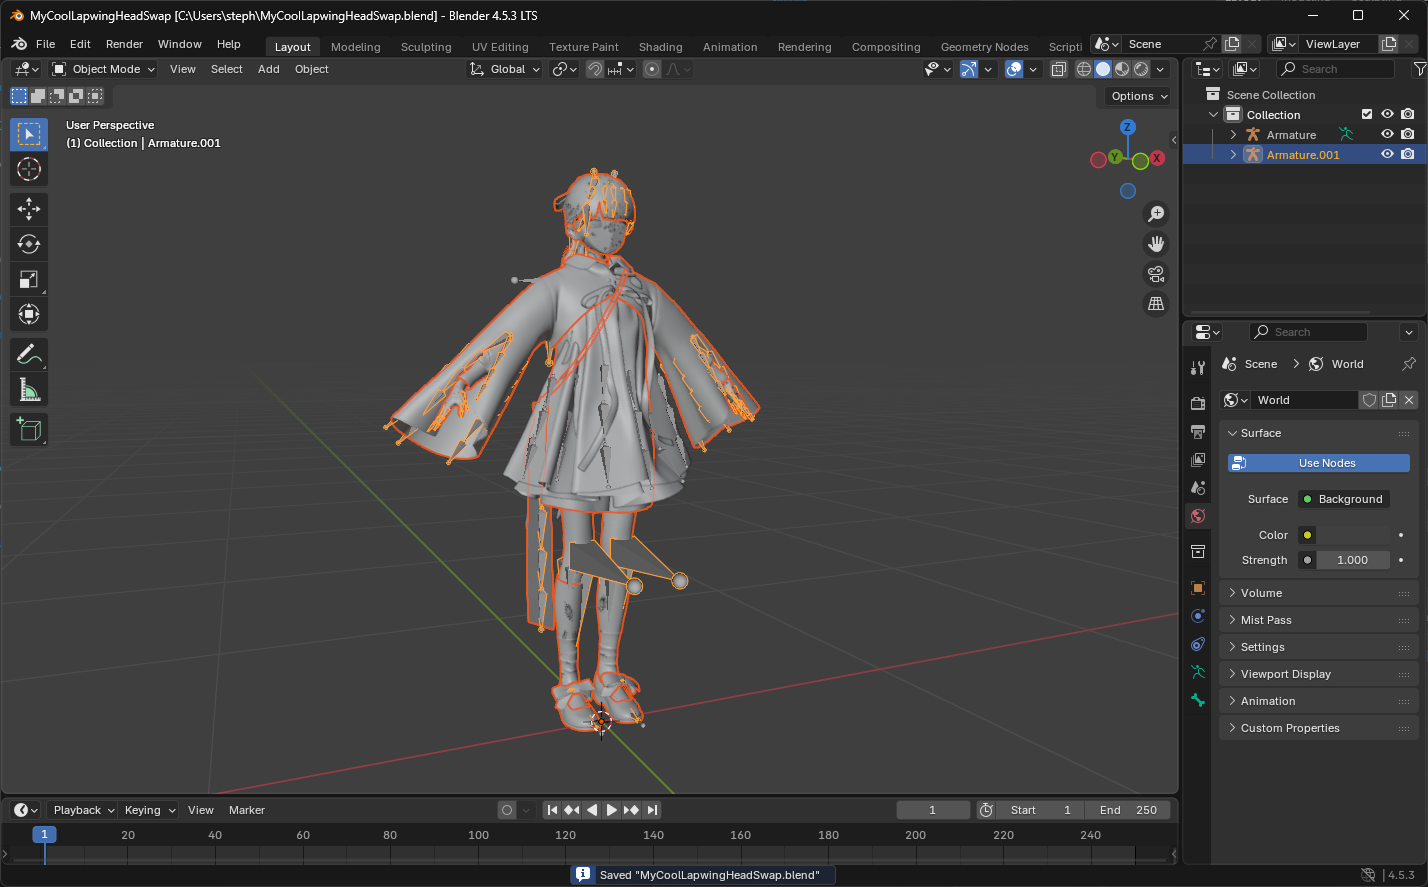
Your custom model should now be into Blender! Feel free to save it somewhere safe by pressing Ctrl+S to save your progress 😃
Import the face tracking model
Same steps as before
Direct yourself at the top left of your window
Click
FileClick
ImportClick
FBXSelect where the face tracking model is located at (Under Hash's_Things/AvatarName/fbx)
Press the
Import FBXbutton at the bottom left of the window
Matching materials
Develop what's under the armature that should be named
Armature.001and select the face tracking head mesh (namedBody.001most times)Select the Materials tab

Click the black materials icon to change the currently selected material
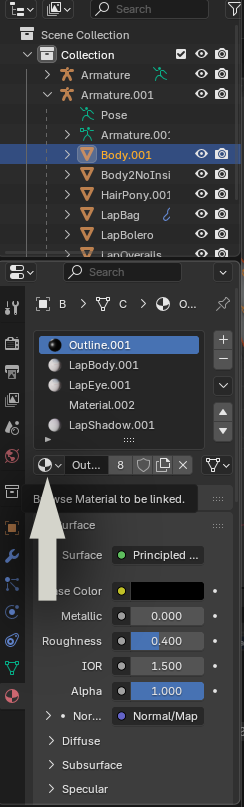
- Select the version of the material without the
.001at the end of its name
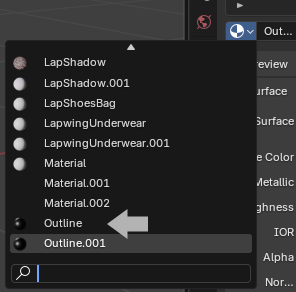
- Select the material bellow
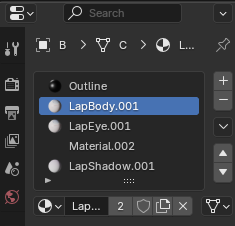
- Reproduce the process for the rest of the materials
Assign the armature of the custom avatar to the face tracking head
Develop what's under the armature that should be named
Armature.001and select the face tracking head mesh (namedBody.001most times)Select the modifiers tab

Click the Object field
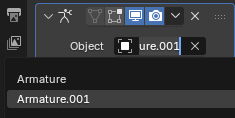
- Select
Armature
Reparent head
Select the Face tracking head mesh
Drag it above the original armature
Before releasing hold
Shift+AltRelease your left click
Delete the rest of the face tracking fbx
Select
Armature.001Hold
ShiftHold
↓until everything is selectedPress
Del
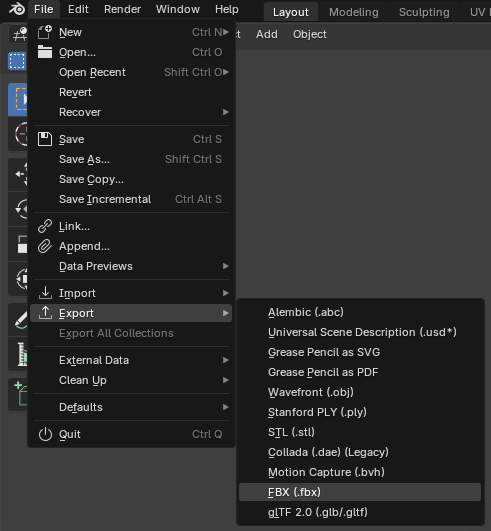
Export your work
- Direct yourself at the top left of your window
- Click
File - Click
Export - Click
FBX
Select where your custom model is located at
Click the file
Switch back to Unity
Select your custom FBX file in the Unity file explorer
Look at the inspector window
Take note of the Convert Units scaling (Here it's
1M/Unitbut it can also be1cm/Unit)
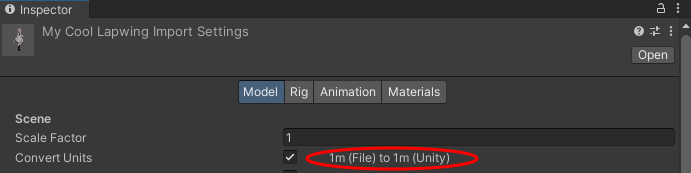
- In the Blender Export window take the appropriate export scaling
1M/Unit = FBX All&1cm/Unit = All Local
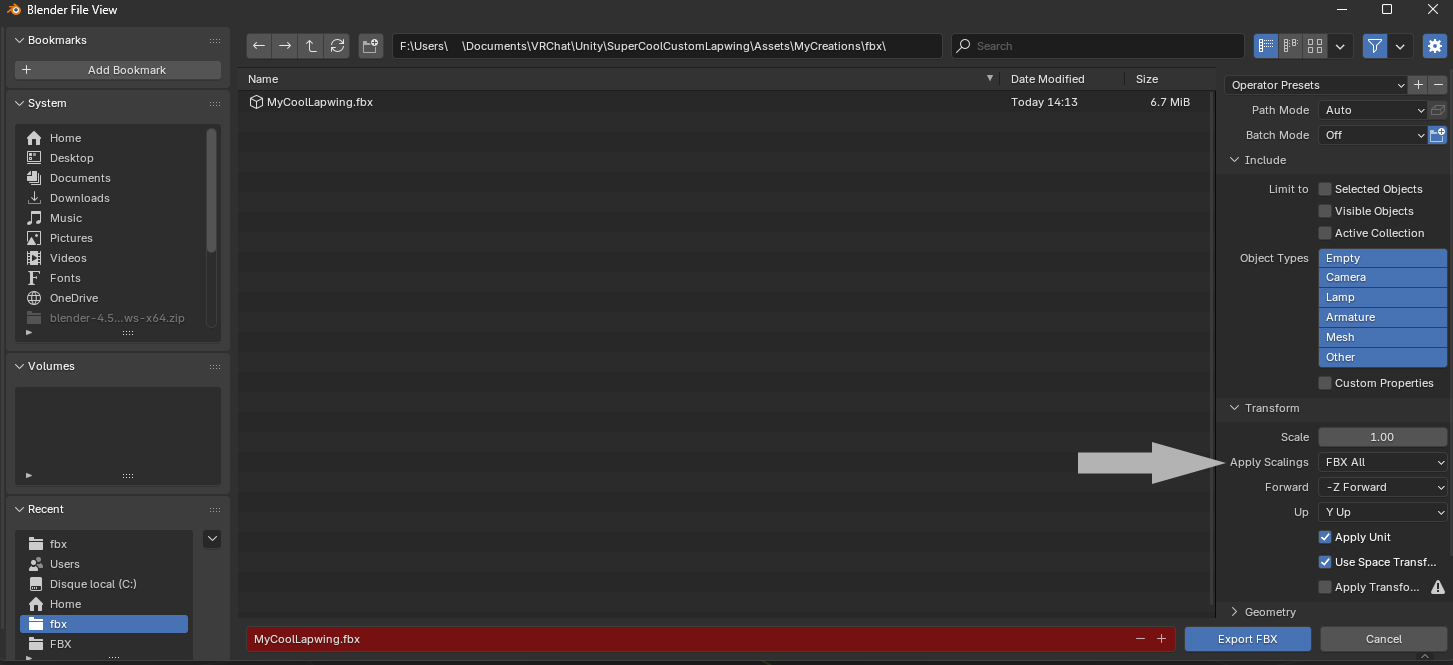
- Press
Export FBX
Match eye rotation from the face tracking fbx
- Select the face tracking fbx in unity
- Go to the inspector tab
- Click on
Rig - Click
Configure... - Click on
Muscles & Settings - Under the
Per-Muscle Settingsgroup click onHeadand develop the following:Eye Down-Up,Eye In-Out,Eye Down-Up,Eye In-Out - Take a screenshot to remember the settings
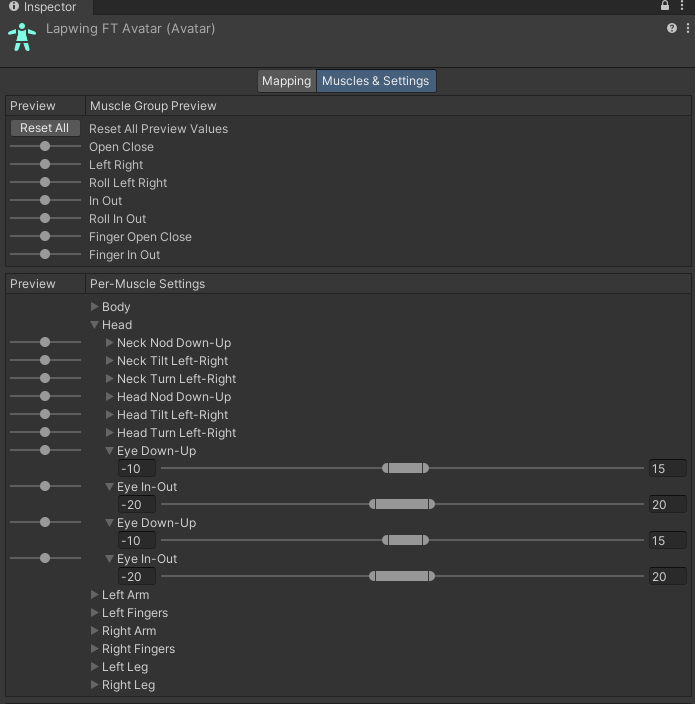
Press
DoneRepeat the same To access the eye muscle settings on your custom fbx
Enter the settings you screenshot earlier
Assign menu, parameters and animation controllers
Drag and drop the face tracking prefab in your scene
Right click on it
Click properties
Put the second inspector window side by side with the original one
Once you are done click the
donebutton and clikcapplyon the pop up that appears
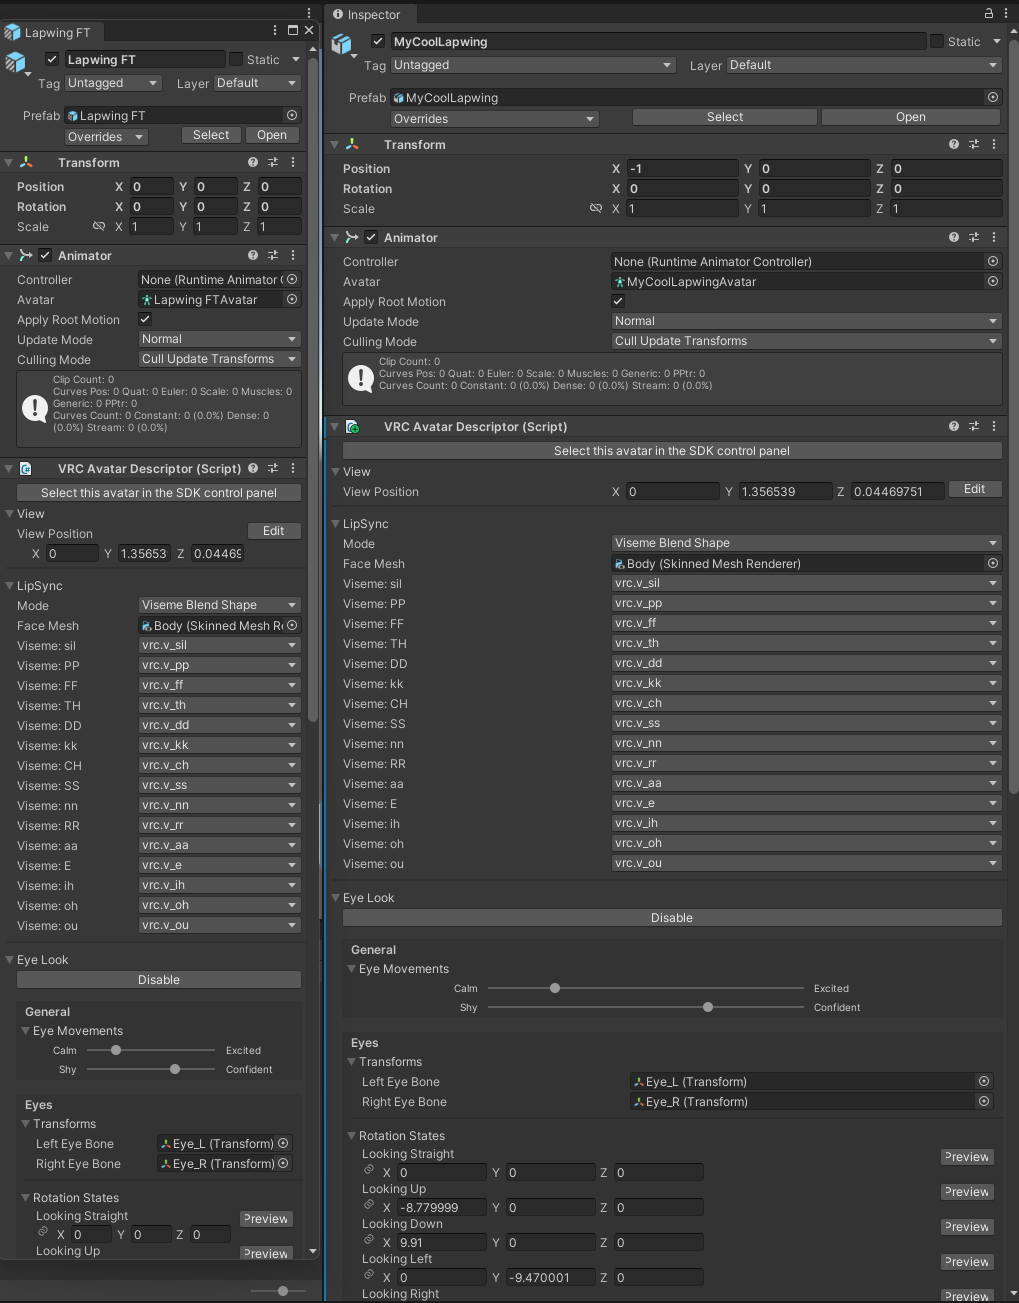
Select your prefab
Click on Playable Layers on both inspectors
Click on the Additive animation controller on the FT prefab inspector
Drag and drop the highlighted animation controller into the additive slot on your prefab
Do the same for the FX controller
Scroll down on both inspectors to the very bottom and click on expressions
Remplace the menus in the same way
Merging onto existing setups extra logic
This section is interesting if you have existing animation controller logic which enables custom toggles or systems on your avatar.
Modular Avatar is not supported because it does not re-order the ID of VRC layer drivers which breaks my smoothing logic
VRCFury
Click here to show details
Please note that I will not provide support for this way of merging my animation controllers
WARNING
Double check that your animator follows the following:
- Doesn't have any states that sets the
Eyes & Eyelidssection of a Animator Tracking Control animation state behavior to anything other thanNo Change - Uses the
FacialExpressionsDisabledto suppress any gestures (All normal gesture transitions should have a check onFacialExpressionsDisabled==falseand have a default state with only a single any state condition:FacialExpressionsDisabled==true)
Add VRCFury to your list of repositories by clicking here
Click
Manage ProjectSearch for VRCFury
Click the
+Button
Go back to Unity
Right click on your avatar
Click on
Create EmptyName it something that makes sense (ex:
VRCFHashFT)Click the
Add ComponentButtonSearch for
Full Controller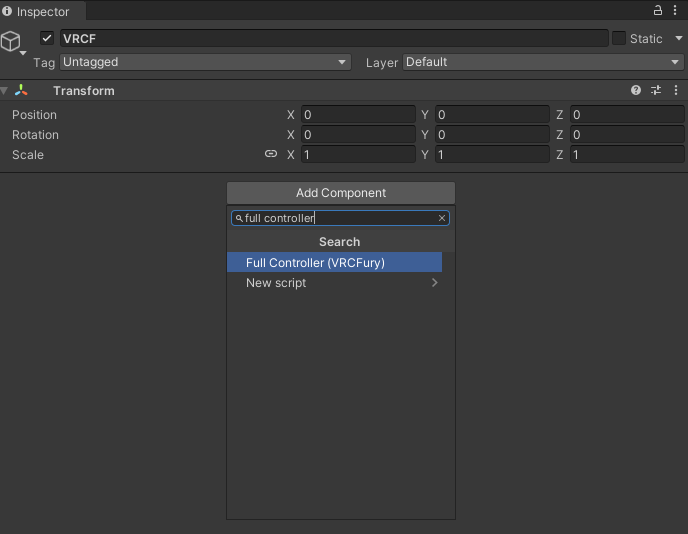
Click on the text
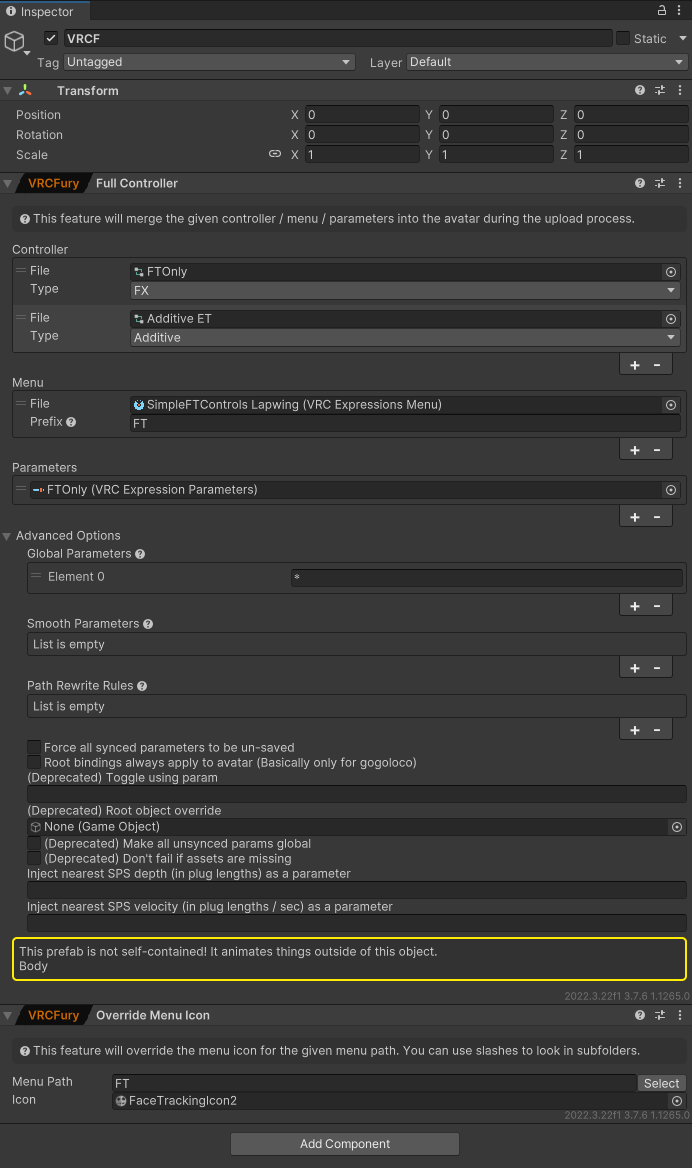
Full Controller (VRCFury)to add the componentClick the
+Button under the Controller section 2 timesAssign the
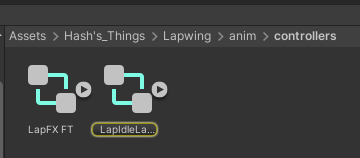
FTOnlyandAdditive ETcontrollers that can be found underHash's_Things/AvatarName/anim/controllersClick the
+Button under the Menu sectionAssign the SimpleFTControls menu under File
Write
FTunder PrefixClick the
+Button under the parameters sectionAssign the FTOnly parameters
Click on advanced options
Click the
+Button under global parametersWrite
*Optional
- Add an
Override Menu Iconcomponent - Write
FTon the Menu Path - Click the target next to the icon slot
- Search for
FaceTrackingIcon2
- Add an
This is what it should look like:
Manual
Click here to show details
Make sure you have
Avatars 3.0 Manageradded to your project's packages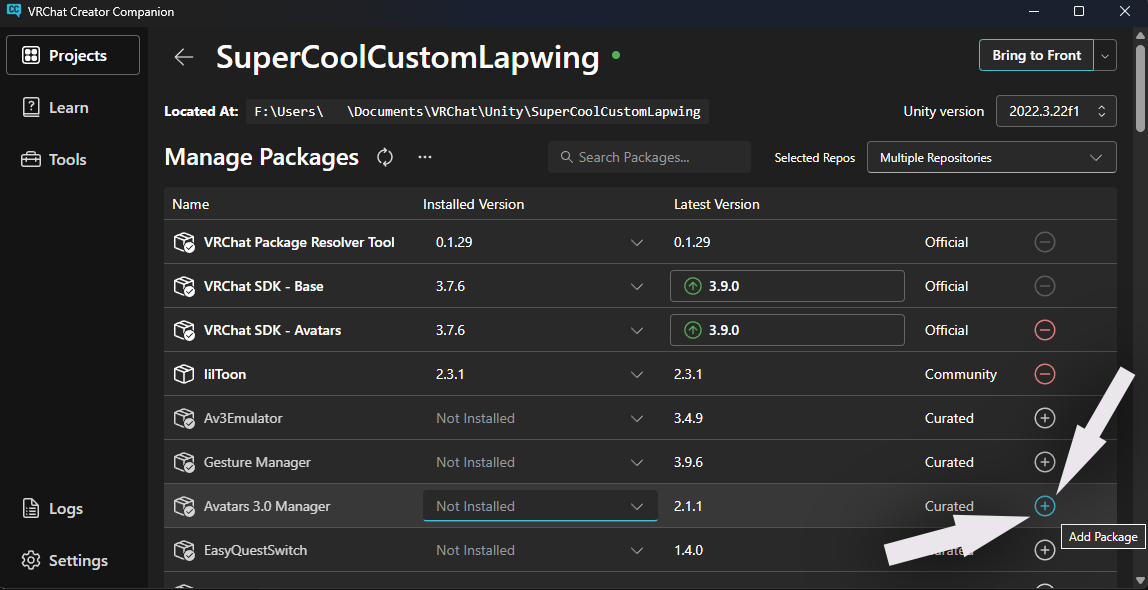
FX
Open your animator by selecting your avatar scrolling to
playable layersand double on the item next toFX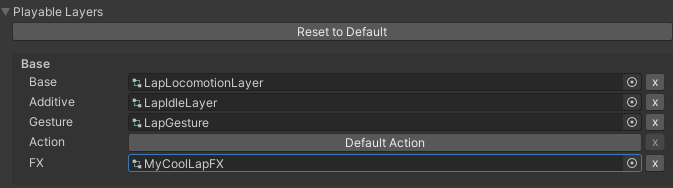
Duplicate it by selecting it and pressing
Ctrl+DIdentify and delete anything that's not part of the default
FXcontrollerTo do that you'll need to compare what you added on top of your FX controller by opening your animation controller and the default one
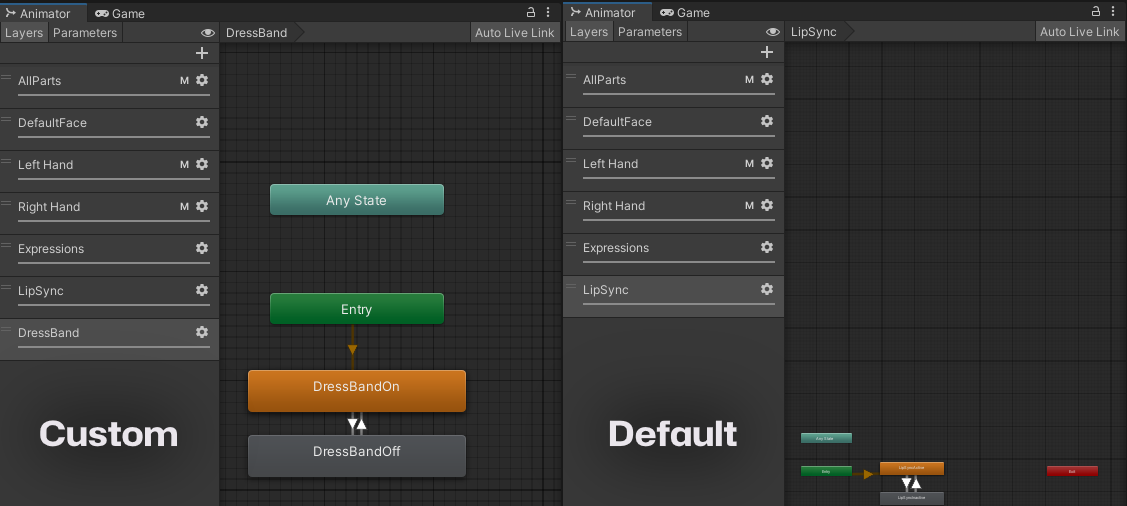
Here for exemple only the
DressBandlayer has been added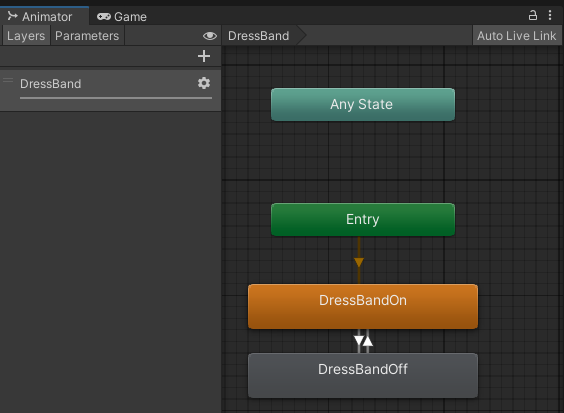
This is what mine looks like after deleting the rest of the layers
WARNING
Make sure that you don't have any states that sets the Eyes & Eyelids section of a Animator Tracking Control animation state behavior to anything other than No Change
Assign the Face Tracking animator that corresponds to the name of your FX Controller with FT at the end of it
Open The AV3 Emulator window

Drag and drop your avatar in the avatar slot
Click FX
Scroll down to the bottom
Click
Add Controller to mergeDrag and drop the duplicate of your FX Controller with only your animation logic
Click
Clear all suffixes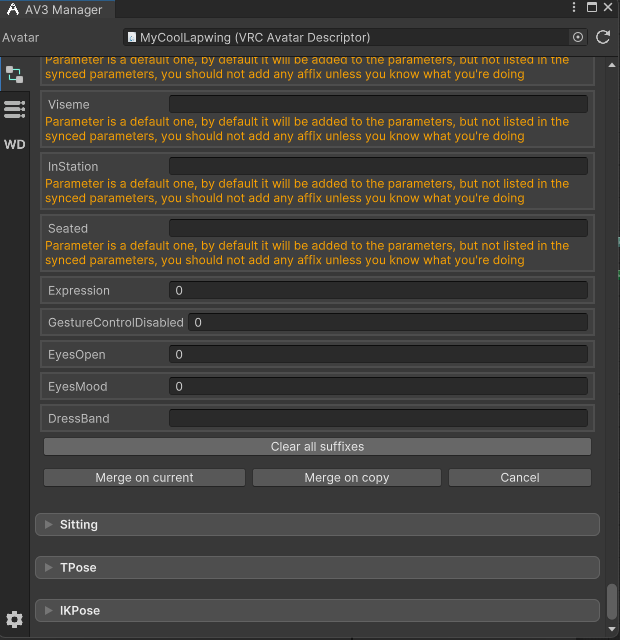
Click
Merge on copyYou're done with the animator!
Parameters
- Switch your parameters to the ones that corresponds to the name of your parameters with FT at the end of it
- Extract your custom logic VRCAvatarParameters onto a different file
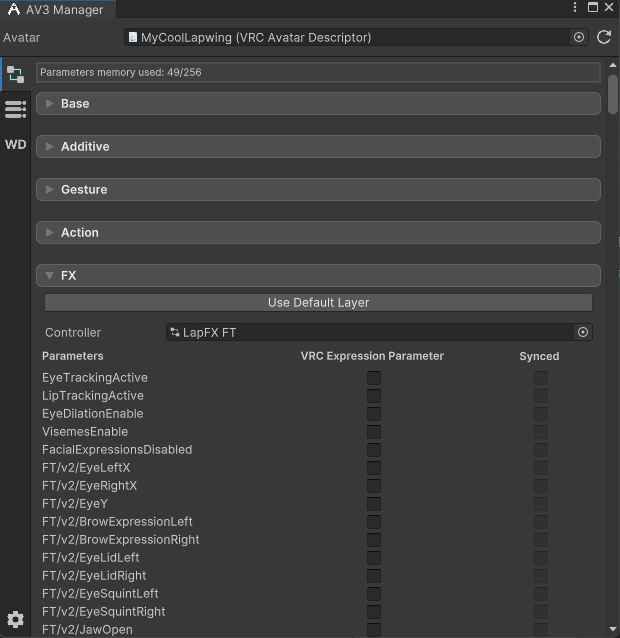
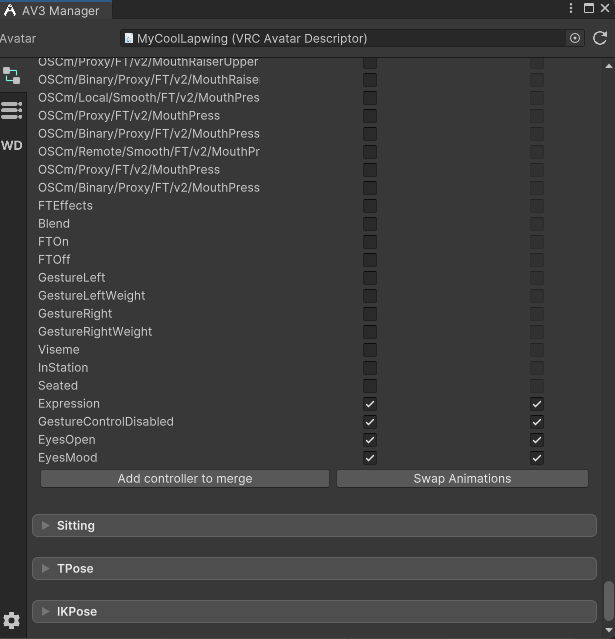
- Open the Avatar 3.0 Manager window
- Drag and drop your avatar
- Click on the parameters tab
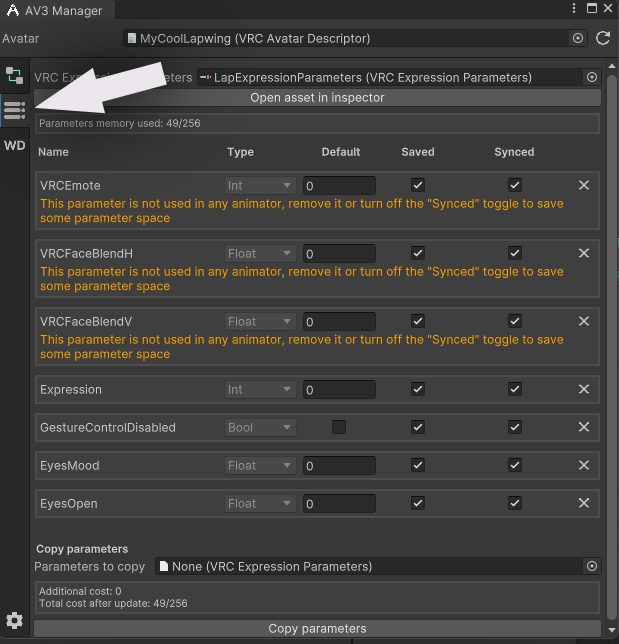
- Add your isolated parameters
- Click
Copy parameters
Menus
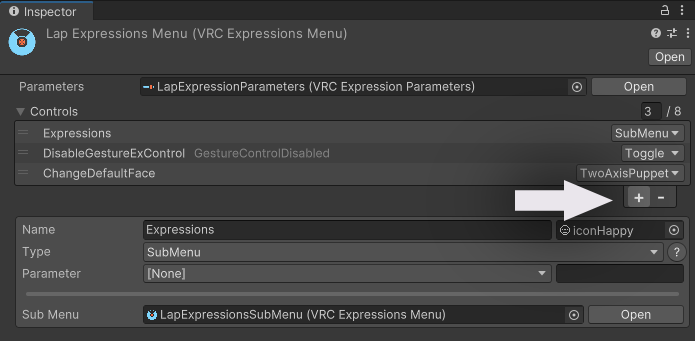
- Select your existing menu by double clicking the item next to menu under the expression dropdown of the avatar descriptor
- Click the
+button
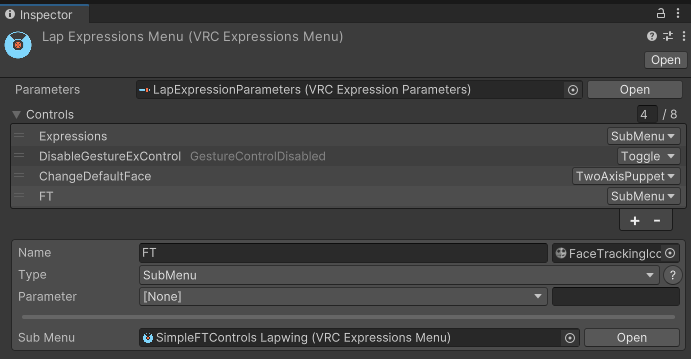
Rename the menu to
FTClick the little target near the icon and search for
Faceand assign the white VRCFT logoSelect
SubMenuas the typeClick the little target next to sub menu and search for
simpleand assign the simple sub menu
You're done !
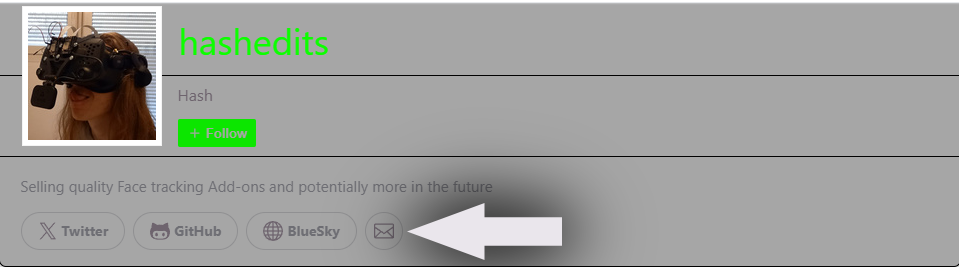
You should now be ready to upload your custom avatar with my face tracking to VRChat, if you're running into issues I am avaliable trough Booth DMs By clicking the mail icon on my Booth page